 By Emily Parker
Updated November 2026
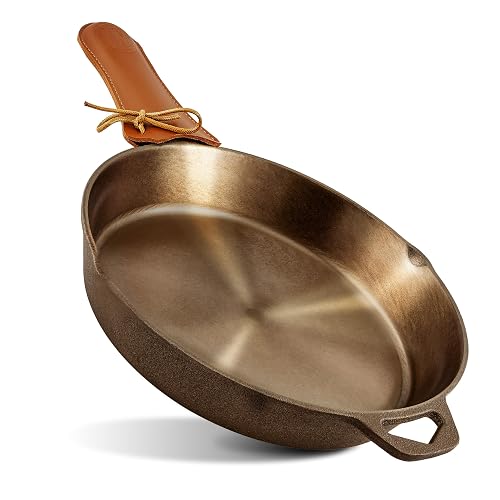
A fried chicken cast iron skillet is one of the most reliable tools a home cook can use for crispy, evenly browned chicken. Cast iron holds heat well, so the oil stays at a steady temperature even after you add cold chicken. In this guide, you will learn how to choose the right pan, set up your oil, fry the chicken in batches, and check for doneness without guessing. By the end, you will be able to make a skillet of fried chicken with a golden crust and moist meat.
Why Cast Iron Works Well for Frying Chicken
Cast iron is dense, so it absorbs heat slowly and releases it steadily. When you lower chicken into hot oil, the temperature drops. A thin aluminum pan can lose heat fast and produce greasy, soggy coating. A heavy skillet recovers quickly, which helps the crust set before the oil soaks in. Many cooks also like that cast iron can handle the high heat needed for deep-frying without warping.
Shopping for one? See our guide: Lodge Cast Iron Skillet Review: Pros and Cons.
Cast iron also gives you depth. The pan is deep enough to hold a shallow pool of oil, usually about one inch, which is enough to fry bone-in pieces without using a full deep fryer. That makes a 10 or 12 inch skillet a practical choice for weeknight fried chicken.
Gear and Ingredients You Need
- A 10 to 12 inch cast iron skillet with a flat, smooth cooking surface
- A deep-fry or instant-read thermometer that reads at least 400°F
- A high smoke point oil such as peanut, canola, or refined vegetable oil
- Bone-in, skin-on chicken pieces, about 3 to 3.5 pounds total
- Buttermilk or a seasoned brine for soaking
- Seasoned flour or a dredge with salt, pepper, paprika, and garlic powder
- A wire rack set over a sheet pan for draining
- Long tongs and a splatter screen
How to Fry Chicken in a Cast Iron Skillet: Step by Step
Step 1: Prepare the Chicken
Soak the chicken pieces in buttermilk or a salted brine for at least four hours, or overnight in the refrigerator. The soak tenderizes the meat and helps the coating stick. Pat each piece dry before dredging, because excess moisture creates a gummy layer. Let the coated pieces rest on a rack for 10 to 15 minutes so the coating hydrates and bonds.
Step 2: Check Your Skillet
Make sure the pan is clean, dry, and well seasoned. A thin, even layer of seasoning helps prevent sticking. If the surface is sticky or has flaking patches, clean and re-season it before frying. Our guide on How to Season Cast Iron Skillet walks through the process.
Step 3: Heat the Oil to the Right Temperature
Pour in enough oil to reach about one inch up the sides of the pan. Heat it over medium-high until the thermometer reads 325°F to 350°F. Keep the temperature in this range for most of the cooking. If the oil climbs above 375°F, the crust can burn before the thickest parts cook through. If it drops below 300°F, the chicken absorbs grease and turns heavy.
Step 4: Fry in Batches
Add pieces skin side down, starting with the thighs and drumsticks, which take longer. Do not crowd the pan. Leave at least an inch between pieces. Overcrowding drops the oil temperature and causes steaming. Fry in two or three batches if needed, and keep finished pieces warm in a 200°F oven.
Step 5: Turn and Monitor
Cook the first side for 6 to 8 minutes until deeply golden. Turn once with tongs and cook the second side for another 6 to 8 minutes. Adjust the heat as needed to keep the oil steady. Smaller pieces like wings may need only 8 to 10 minutes total.
Step 6: Check Doneness
Use an instant-read thermometer. Chicken is safe to eat when the thickest part reaches 165°F. Dark meat often tastes better at 175°F to 185°F because the connective tissue breaks down. Insert the probe into the meat without touching the bone.
Step 7: Drain and Rest
Move the cooked chicken to a wire rack over a sheet pan. Racks keep the bottom crust crisp, while paper towels can trap steam and soften it. Let the chicken rest for five minutes before serving.
Recommended Times and Temperatures
| Cut | Approximate Time | Target Internal Temp |
|---|---|---|
| Wings | 8 to 10 minutes total | 165°F |
| Drumsticks | 12 to 15 minutes total | 175°F to 185°F |
| Thighs | 13 to 16 minutes total | 175°F to 185°F |
| Breasts (bone-in) | 14 to 18 minutes total | 165°F |
Times vary with piece size, oil temperature, and pan thickness, so always confirm with a thermometer.
Common Mistakes to Avoid
- Frying cold chicken straight from the fridge. Let it sit for 15 to 20 minutes so the oil temperature stays more stable.
- Overcrowding the pan. This is the most common cause of soggy coating.
- Skipping the thermometer. Guessing oil temperature leads to burned outsides and raw centers.
- Draining on paper towels. A rack keeps the crust crisp.
- Leaving oil in the pan after cooking. Strain and store it once it cools, and keep the skillet clean. For care steps, see How to Clean a Cast Iron Skillet.
Tips for Better Results
- Season the flour well, since the coating is your main source of flavor.
- Double-dredge for an extra-craggy crust, pressing the flour firmly onto each piece.
- Preheat the skillet with the oil for a few minutes before adding chicken so the pan heats evenly.
- Use a splatter screen. Cast iron holds heat well, and oil can spatter more than you expect.
- Let the oil cool completely in the pan before handling, and never pour hot oil down the drain.
Recommended Gear
A good instant-read thermometer is the single most useful tool for this method, because oil temperature decides how the crust turns out. The thermometer should read at least 400°F.
Look for a clip-on or probe-style deep-fry thermometer that stays in the oil without touching the pan bottom. This keeps readings accurate. View on Amazon
A wire cooling rack set over a rimmed sheet pan keeps the crust crisp while the chicken rests. Choose one with a fine grid so small pieces do not slip through. View on Amazon
A splatter screen lets you fry in a heavy pan without covering the whole stovetop in oil. Pick a mesh model that fits a 10 to 12 inch skillet. View on Amazon
Long stainless steel tongs give you control when turning heavy bone-in pieces. Look for a lock and a comfortable grip so you can lift chicken out of hot oil safely. View on Amazon
FAQ
What size cast iron skillet is best for fried chicken?
A 10 to 12 inch skillet works well for two to four servings. It holds enough oil and enough chicken per batch without crowding. A smaller pan works, but you will need more batches.
How much oil do I need in a cast iron skillet for frying?
About one inch of oil is usually enough. This depth lets the chicken cook in the oil without deep-frying the whole piece. Check that the oil does not reach the rim when you add the chicken.
Can I use olive oil to fry chicken in cast iron?
Extra virgin olive oil has a lower smoke point and can taste bitter at frying temperatures. A refined oil like peanut, canola, or vegetable oil is a better choice.
Why is my fried chicken soggy in a cast iron skillet?
The most likely causes are an oil temperature that dropped too low, too many pieces in the pan at once, or draining on paper towels. Use a thermometer, fry in batches, and rest the chicken on a rack.
Should I cover the skillet while frying chicken?
Most cooks skip the lid for fried chicken because a lid traps steam and softens the crust. A splatter screen gives you protection without the sogginess.
How do I know when fried chicken is cooked through?
Use an instant-read thermometer. Breasts reach 165°F, and dark meat is best at 175°F to 185°F. Do not rely on color alone, since the crust can look done before the center is ready.
Can I reuse the frying oil?
You can reuse oil once or twice if you strain it and store it sealed in a cool, dark place. Discard it if it smells rancid, looks very dark, or foams heavily. If you have health or dietary concerns about fried foods, consult a registered dietitian or your doctor.
How do I clean the skillet after frying chicken?
Let the pan cool, strain the oil, and scrape out food bits with a stiff brush or scraper. Wipe the pan, warm it briefly to dry, and apply a thin coat of oil. Avoid soaking the pan for long periods.
Conclusion
Frying chicken in a cast iron skillet is a dependable method once you control three things: oil temperature, batch size, and doneness. Keep the oil between 325°F and 350°F, fry in batches, and check the internal temperature every time. With practice, your fried chicken will come out golden, crisp, and juicy. Keep your pan seasoned, and it will improve with every use.
Related reading
- Southern Fried Chicken Cast Iron Skillet: A Step-by-Step Guide for Crisp Results
- Wagner's Cast Iron Skillet: A Practical Guide (2026)
- Vintage Skillet Cast Iron: How to Find, Restore and Use One (2026)
- Vintage Cast Iron Skillet Handles: How to Identify, Restore, and Replace Them
- Vintage Cast Iron Skillet Griswold: How to Identify, Restore and Use One
Ready to choose one?
About Emily Parker
Emily Parker is part of our editorial team and reviews and edits our cookware & knives guides, checking product details against manufacturer specifications and owner feedback.