As an Amazon Associate we earn from qualifying purchases. This page may contain affiliate links.
A homemade Dutch oven bread recipe is one of the most reliable ways to get bakery-style bread at home without a steam oven or a stone. You mix four basic ingredients, let the dough ferment slowly, and bake it inside a preheated covered pot. The lid traps the moisture that the dough releases, which gives you a thin, crackly crust and an open, airy crumb. This guide covers the ingredients, the timing, the bake itself, and the mistakes that most often lead to flat or gummy loaves.
What You Need Before You Start
This recipe makes one round loaf of about 2 pounds. The dough is simple, so the quality of your results depends more on timing and temperature than on any special ingredient.
Ingredients
- 500 g (about 4 cups) bread flour. Bread flour has more protein than all-purpose, which builds the gluten network that traps gas. All-purpose works, but the loaf will be a little softer and less structured.
- 375 g (about 1 1/2 cups) lukewarm water. This is 75 percent hydration, meaning the water weighs three-quarters of the flour. The dough will look shaggy and sticky. That is expected.
- 10 g (about 1 3/4 teaspoons) fine sea salt or table salt. Salt controls fermentation speed and tightens the gluten. Measure it by weight if you can, because volume measurements vary a lot.
- 2 g (about 3/4 teaspoon) instant yeast. A small amount is enough for a long, slow rise. Using more will speed fermentation but reduce flavor.
- Optional: a pinch of sugar or a tablespoon of olive oil. Neither is necessary. Leave them out for a classic loaf.
Equipment Checklist
- A Dutch oven with a tight-fitting lid, roughly 5 to 6 quarts, ideally one that is oven-safe to at least 450°F
- A large mixing bowl and a dough scraper or sturdy spatula
- A digital kitchen scale that reads in grams
- A clean kitchen towel, lightly dusted with flour or rice flour, for the final rise
- A sharp blade or bread lame for scoring
- An oven thermometer to confirm your oven’s actual temperature
- A reliable instant-read thermometer for checking the internal temperature
If you are still choosing a pot, the Dutch oven buying guide explains how material and lid fit affect baking, and the Best Dutch Ovens roundup compares common options by size and build. For the bake itself, any heavy pot with a snug lid will do.
Step-by-Step: Making the Dough
Step 1: Mix the Dough
Whisk the flour, salt, and yeast together in your bowl so the salt is evenly spread. Pour in the water and stir with a spatula or your hand until no dry flour remains. The dough should be shaggy and wet. Cover the bowl and let it rest for 20 minutes. This short rest, called autolyse, lets the flour absorb water and begin developing gluten without kneading.
Step 2: Develop Structure with Folds
Wet your hand, grab one edge of the dough, stretch it up, and fold it over the center. Turn the bowl a quarter turn and repeat. Do four sets of folds, spaced 30 minutes apart, for a total of about two hours. You will feel the dough tighten and become smoother after each round. Stop when it holds its shape better and feels slightly springy.
Step 3: Bulk Fermentation
Cover the bowl and leave it at room temperature, around 68 to 72°F, for 12 to 18 hours. The dough should roughly double in size, and the surface should show bubbles. Cooler kitchens need the longer end of this range. Warmer kitchens may finish in about 8 to 10 hours, so check the dough rather than the clock.
Shaping and the Second Rise
Step 4: Pre-Shape
Flour your counter lightly and tip the dough out. Fold the edges into the center to form a rough ball. Let it rest uncovered for 15 minutes so the surface relaxes. This makes final shaping easier.
Step 5: Final Shape
Flip the dough over. Pull the edges toward the center, then pinch the seam shut. Turn the ball seam-side down, and cup your hands around it. Drag it toward you on the counter to build surface tension. The top should look smooth and taut. Tight shaping gives the loaf height in the oven.
Step 6: Proof in a Towel
Place the dough seam-side up on a floured towel set in a bowl, or on a towel-lined tray. Fold the towel loosely around it. Let it rise for 1 to 2 hours at room temperature, until it looks puffy and springs back slowly when poked with a floured finger. For a more flexible schedule, you can refrigerate the shaped dough for up to 12 hours, then bake it straight from the fridge.
Baking in the Dutch Oven
Step 7: Preheat the Pot
Place the Dutch oven with its lid on the center rack. Preheat the oven to 500°F (260°C). Let the pot heat for at least 45 minutes so it is fully hot before the dough goes in. Many home ovens run 15 to 25 degrees off the setting, so an oven thermometer helps. The article on oven temperature accuracy explains why this gap matters for bread.
Step 8: Score and Load
Remove the pot carefully with thick mitts. Lift the dough by the towel and invert it onto a sheet of parchment, seam-side down. Cut a single slash about 1/2 inch deep across the top, at a 30-degree angle. Lower the parchment and dough into the pot. The parchment is a practical handle and prevents sticking. Cover with the lid and return the pot to the oven.
Step 9: Covered Bake
Bake covered for 30 minutes. The trapped steam keeps the crust soft long enough for the loaf to expand, which is called oven spring.
Step 10: Uncovered Bake
Remove the lid and reduce the temperature to 450°F (230°C). Bake uncovered for another 12 to 18 minutes. The crust should be deep golden brown. For a reliable check, insert an instant-read thermometer into the center. The internal temperature should reach about 205 to 210°F.
Step 11: Cool
Lift the loaf out with the parchment and place it on a wire rack. Let it cool for at least one hour before slicing. Cutting too early releases steam and can leave the crumb gummy. When you are ready, a long serrated blade works best. The guide on how to slice bread properly with a serrated knife covers the technique, and the 17 best bread knives list shows the blade lengths that suit a round loaf.
Recommended gear
A few tools make this bake more consistent. None are required, but each addresses a common failure point.
- Enameled cast iron Dutch oven (5 to 6 quarts). Its heavy walls hold heat steadily, and the lid traps steam well. Enameled surfaces are easier to clean after a sticky dough. Care tips are in the enameled Dutch oven care and maintenance guide. Check price on Amazon
- Bread lame with replacement blades. A lame holds a razor blade at a shallow angle, which makes clean, controlled scores easier than a kitchen knife. Check price on Amazon
- Digital kitchen scale. Weighing flour and water is the most effective way to get repeatable dough. A scale that reads in one-gram increments is enough. Check price on Amazon
- Oven thermometer. Your oven’s dial may not match the real temperature. A standalone thermometer shows the actual heat so you can adjust. Check price on Amazon
Troubleshooting: Common Mistakes and Fixes
Most problems trace back to three factors: fermentation time, dough tension, and oven heat. The table below matches common symptoms with likely causes.
| What you see | Likely cause | What to change |
|---|---|---|
| Flat, wide loaf | Over-proofed dough or weak shaping | Shorten bulk time, or shape the dough tighter |
| Dense, tight crumb | Under-proofed dough or too little folding | Extend bulk or final proof, add one more set of folds |
| Pale crust | Pot not fully preheated, or lid off too soon | Preheat for 45+ minutes, keep lid on for the full covered bake |
| Burnt bottom | Pot too close to the heating element | Use the center rack, or add a second rack or baking sheet beneath |
| Gummy interior | Cut before cooling, or internal temp too low | Cool at least one hour, bake until 205 to 210°F |
| Stuck to the pot | No parchment, or pot not greased | Use parchment, lift the dough out after baking |
Tips for Better Results
- Trust the dough, not the clock. Room temperature changes fermentation speed. Look for bubbles, doubling, and a jiggly surface.
- Check your pot’s temperature rating. Some enameled pots list a lower maximum than 500°F, and the knob may have its own limit. Review the manufacturer’s instructions. If your lid knob is plastic or phenolic, remove it or swap it for a metal one if the manual says so.
- Use rice flour on the towel. It releases dough more cleanly than wheat flour and does not absorb as much moisture.
- Cool completely. The crumb sets as it cools. An hour is the minimum.
- Handle the hot pot with care. Use thick oven mitts and set the pot on a heatproof trivet. Never place a hot pot on a cold or wet surface.
Storing and Reheating
Store cooled bread cut-side down on a cutting board, or wrap it in a clean cotton towel. A paper bag works for a day. Plastic wrap softens the crust. For longer storage, slice the loaf and freeze the pieces in a sealed bag for up to three months. Toast slices straight from frozen, or warm a whole loaf at 350°F for 10 to 15 minutes to refresh the crust.
FAQ
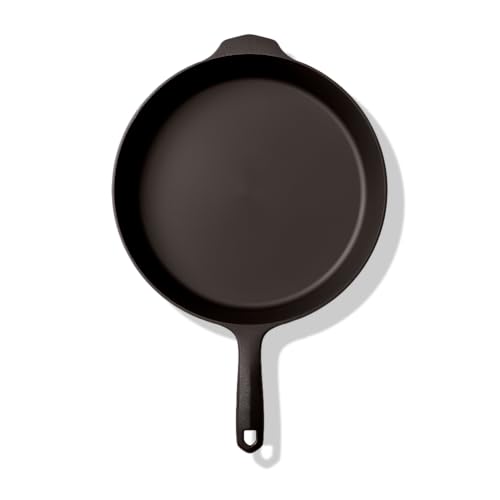
Can I use a cast iron skillet instead of a Dutch oven?
You can, but a skillet is open and cannot trap steam the way a lidded pot does. Cover the loaf with a second heavy pot, or an inverted larger pot, for the first 30 minutes to create a similar effect.
Why does my bread taste sour or flat?
Long, cool fermentation builds flavor, but a dough left too long can taste sour and collapse. Also check your salt. Too little salt can make the flavor flat. Weigh your ingredients for consistency.
Do I need a stand mixer?
No. This recipe uses folds instead of kneading, so a bowl and a spatula are enough. A mixer is not required.
Can I add whole grains or seeds?
Yes. Replace up to 20 percent of the bread flour with whole wheat or rye, and increase the water by about 10 to 15 grams to compensate. Add seeds during the last fold so they distribute evenly.
Is it safe to put a Dutch oven at 500°F?
Many cast iron and enameled pots handle this temperature, but limits vary by brand and model. Check the manufacturer’s maximum temperature and any knob limits before you bake. If you have questions about your specific pot, contact the manufacturer or a qualified appliance professional.