As an Amazon Associate we earn from qualifying purchases. This page may contain affiliate links.
Knowing how to season cast iron skillet surfaces is one of the most useful skills a home cook can pick up. In this guide, you will learn what seasoning actually is, which oils and temperatures work, and the exact steps for building a smooth, nonstick layer in your oven or on your stovetop. The process takes about an hour per coat, plus cooling time, and the result is a pan that gets better every time you cook in it.
What Seasoning Actually Is
Seasoning is a layer of polymerized oil bonded to the bare iron. When you heat a thin film of oil past its smoke point, the fat molecules break down and link together into a hard, slick coating. That coating fills in the tiny pores of the cast iron and gives food less surface to grab onto. It is not a coating you add on top of the pan like nonstick. It is part of the metal’s surface now.
This matters for two reasons. First, seasoning is built up in thin layers over time, so one thick coat will not do the job. Second, the finish is only as good as the cooking and cleaning that maintain it. Acidic foods, long soaks, and harsh detergents can wear it down, which is why many pans need periodic touch-ups. If your skillet is already sticky, dull, or flaking, the steps below still apply after you strip the old layer. For that situation, see How to Fix and Restore Damaged Cast Iron Seasoning.
What You Need Before You Start
You do not need specialty equipment. Most kitchens already have what is required. Gather these before you begin:
- A cast iron skillet, cleaned and dried (new or old)
- A high smoke point oil, such as flaxseed, grapeseed, canola, or vegetable shortening
- Paper towels or a lint-free cloth
- Heavy-duty aluminum foil
- A baking sheet or the lower rack of the oven, to catch drips
- Heat-resistant gloves or oven mitts
- Good ventilation, since oil smoke is normal during this process
Plan on about an hour of active oven time for each coat. Three to four coats is a reasonable starting point for a new pan. Cooling takes a while too, so set aside an afternoon or evening rather than trying to rush it before dinner.
Step-by-Step: How to Season a Cast Iron Skillet in the Oven
The oven method is the most common approach because it heats the pan evenly and helps the oil polymerize throughout. The steps below walk through the full process, and they work for both pre-seasoned pans and bare iron.
Step 1: Clean the pan thoroughly
If the pan is new, many manufacturers recommend washing it with warm water and a small amount of mild dish soap to remove factory coatings or shipping residue. Scrub with a stiff brush or nylon pad. For an old pan with built-up grease or rust, you may need more aggressive cleaning first. Rinse well, then dry it completely. Water left in the pores will cause spotting and uneven seasoning. Setting the pan on a burner for a minute or two over low heat is an easy way to drive off any remaining moisture.
Step 2: Preheat the oven
Set your oven to 450°F to 500°F. Many home cooks use 450°F because it provides enough heat to polymerize the oil without producing excessive smoke. Place a sheet of foil on the bottom rack or on a baking sheet to catch any drips. Preheat for at least 15 minutes so the oven reaches a steady temperature.
Step 3: Apply a very thin coat of oil
Pour a small amount of oil, roughly a teaspoon for a 10-inch skillet, onto the pan. Rub it over every surface: the cooking surface, the sides, the handle, and the outside. Then take a clean paper towel and wipe the pan until it looks almost dry. The finished layer should look like a faint sheen, not a wet film. Excess oil is the single most common cause of sticky, gummy seasoning.
Step 4: Bake the pan upside down
Place the skillet upside down on the upper or middle rack, so any drips fall away from the cooking surface. Bake for one hour. Some cooks prefer a shorter interval at a higher temperature, but a full hour at 450°F gives the oil time to bond well.
Step 5: Let it cool in the oven
Turn the oven off and leave the skillet inside until it has cooled completely. Cooling slowly reduces the risk of thermal stress and gives the coating a chance to set. Once cool, remove the pan and check the surface. It should look smooth and slightly darker than before.
Step 6: Repeat the process
Repeat steps 3 through 5 for three to four total coats on a new pan. Each thin layer adds durability. After the final coat, the surface should feel smoother and resist sticking when you fry an egg. Pans that have already been seasoned for years may need only one or two coats for a refresh.
Stovetop Method for Quick Touch-Ups
You can also season a skillet on the stovetop. This method works well for touch-ups between oven sessions or for smaller pans that need light maintenance. It is less uniform than the oven, so it is best used as a supplement rather than a full restart.
- Dry the pan completely over low heat.
- Add a few drops of oil and spread it thinly with a paper towel.
- Heat the pan over medium-high until the oil just begins to smoke.
- Remove from heat, let the pan cool for a few minutes, and wipe off any excess oil.
- Repeat two or three times to build a thin layer.
Keep the ventilation running. Smoke is expected, but heavy smoke can set off alarms and makes the kitchen unpleasant. If you notice the pan smoking heavily, reduce the amount of oil and wipe more thoroughly.
Choosing the Right Oil for Seasoning
The oil you use affects how hard and durable the finish becomes. Several choices are commonly recommended:
| Oil or Fat | Typical Smoke Point | Notes for Seasoning |
|---|---|---|
| Flaxseed oil | Low to moderate (often cited near 225°F to 250°F for unrefined; refined versions are higher) | Forms a very hard finish, but can flake if applied too thickly. Use sparingly. |
| Grapeseed oil | High (often cited around 420°F) | Neutral flavor and polymerizes well for most home cooks. |
| Canola oil | High (often cited around 400°F to 450°F) | Widely available and inexpensive. A reliable everyday choice. |
| Vegetable shortening | High (solid at room temperature) | Easy to apply thinly and often recommended for a smooth, even finish. |
Smoke point figures vary by brand and refinement level, so check the bottle or product sheet when possible. Whatever you choose, the thinness of the layer matters more than the specific oil. A thin coat of canola will outperform a thick coat of an expensive oil every time.
Common Mistakes to Avoid
Most seasoning problems come from a handful of predictable errors. Watch for these:
- Applying too much oil. This creates a sticky, tacky surface. If it happens, bake the pan longer or strip and start over.
- Skipping the drying step. Moisture trapped in the pores prevents the oil from bonding evenly.
- Using too low a temperature. Below about 400°F, the oil may not polymerize fully, leaving a soft film.
- Seasoning on a cold oven rack without foil. Drips that harden on the oven floor are hard to remove and can smoke badly during later cooking.
- Rushing the cooldown. Pulling a hot pan out of the oven can cause warping on some pans and leaves the surface less stable.
- Cooking acidic food too early. Tomato sauce, vinegar, and wine can strip fresh seasoning. Wait until the pan has several good layers before cooking highly acidic dishes.
- Soaking the pan. Long soaks in water will strip the finish and can lead to rust.
Tips for Maintaining Your Seasoning
Seasoning is not a one-time event. Daily habits keep it in good shape. After cooking, scrape food residue off with a spatula or a pan scraper while the pan is still warm. Rinse with hot water and use a small amount of soap if needed. Dry the pan immediately on the burner, then wipe a few drops of oil into the surface with a paper towel. Store it in a dry place. If you stack pans, put a paper towel between them to avoid scratches and moisture.
Cooking fatty foods is one of the easiest ways to build up seasoning over time. Bacon, sausage, and fried foods leave behind a thin film that reinforces the layer. Frying eggs, searing meat, and cooking a skillet of potatoes all contribute. For guidance on high-heat cooking that works well with a seasoned pan, see How to Sear Meat for a Perfect Crust.
If you are still deciding which pan to buy or whether a particular skillet is worth seasoning from scratch, the Cast Iron Skillet Buying Guide for Home Cooks covers weight, handle design, and finish type. For the broader care routine across different materials, the Cookware Maintenance Guide: Cast Iron, Carbon Steel, Stainless and Nonstick is a good companion. Background on how the layer works is also covered in Cast Iron Seasoning Basics.
Recommended Gear
A few inexpensive tools make seasoning and maintenance easier. Each one has a clear purpose.
- A chainmail scrubber. These metal scrubbers remove stuck-on food without stripping the seasoning the way steel wool can. Owners often report that they work well on pans with light buildup. Check price on Amazon
- A bench or pan scraper. A flat, rigid scraper lifts baked-on bits and helps you clean without excessive scrubbing. Check price on Amazon
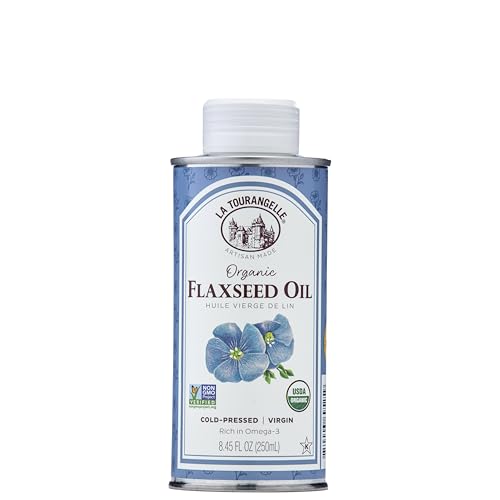
- Flaxseed or grapeseed oil for seasoning. Flaxseed is popular for its hard finish, while grapeseed offers a neutral option with a high smoke point. Check price on Amazon
FAQ
How long does it take to season a cast iron skillet?
A full oven seasoning with three to four coats usually takes about four to six hours once you include cooling time. Touch-ups can be done in under an hour.
Why is my seasoned pan sticky?
Sticky seasoning almost always means too much oil was left on the surface. Bake the pan longer to polymerize the excess, or strip it and reseason using a thinner layer.
Do I need to season a pre-seasoned pan?
Pre-seasoned pans often benefit from one or two extra coats before first use, especially if the factory finish feels uneven. Many cooks also add a light coat of oil after each wash to maintain the layer.
Can I use cooking spray instead of oil?
Many cooking sprays contain additives that can leave a sticky residue when heated. A thin layer of plain oil or shortening is the more reliable choice for seasoning.
Is it safe to season a skillet in the oven?
Yes, as long as the pan is oven-safe and you use caution with hot surfaces and smoke. Wear oven mitts, keep the kitchen ventilated, and let the pan cool fully before handling it.