As an Amazon Associate we earn from qualifying purchases. This page may contain affiliate links.
Seasoning a cast iron pan means baking thin layers of oil onto the metal so they polymerize into a hard, slick, non-stick surface. Done correctly, you end up with a pan that releases eggs cleanly, resists rust, and gets better with use. This guide walks through the oven method most manufacturers recommend, explains why each step matters, and covers the mistakes that cause sticky or flaking results.
Most new cast iron arrives with some factory seasoning, but it is often thin or uneven. Even if you never intend to season from scratch, you will need to re-season after you strip rust, sand down a rough casting, or notice dull patches forming. Learning the process once makes every later repair simpler.
What Seasoning Actually Does
Raw cast iron is porous at a microscopic level. When you heat a thin film of fat past its smoke point, the fat breaks down and its molecules bond to each other and to the metal. This chemical change is called polymerization. The result is a layer that fills the pores, blocks moisture from reaching bare iron, and creates a surface food sticks to less than it would to raw metal.
Seasoning is not a non-stick coating in the same sense as a modern PTFE pan. It is a built-up film that improves with cooking, especially with fatty foods and gentle heat. Acidic or very wet ingredients can dull it over time, but they do not destroy it if you re-season when needed.
What You Need Before You Start
- A clean cast iron pan, free of rust and old food residue
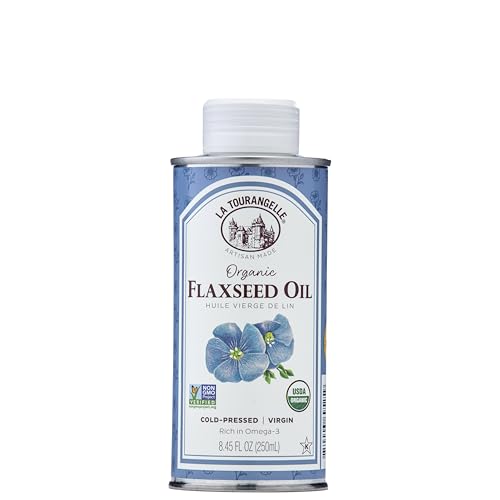
- A high-smoke-point cooking oil such as refined vegetable oil, canola, or grapeseed oil, or flaxseed oil if you prefer its hard finish
- Lint-free cloth or paper towels
- Aluminum foil or a rimmed baking sheet to catch drips
- An oven thermometer, since oven dials can run hot or cold
- Dish soap, a stiff brush or non-abrasive scrubber, and a towel for drying
- Oven mitts
Step-by-Step: Seasoning in the Oven
Step 1: Clean and dry the pan thoroughly
Wash the pan with warm water and a small amount of dish soap. Modern dish soap is generally fine on cast iron, despite old advice to avoid it. Scrub off any sticky residue or loose rust. Dry the pan right away, then set it on a burner over low heat for two to three minutes until every drop of water has evaporated. Leftover moisture trapped in the pores will cause rust under the seasoning.
Step 2: Preheat the oven
Set your oven to between 450°F and 500°F. Many manufacturers suggest about 450°F to 475°F, and some recommend going higher for a harder finish. Place a sheet of foil on the lowest rack to catch any drips, and let the oven heat fully for about 15 minutes. Check the temperature with your oven thermometer, because an inaccurate dial can change the results noticeably.
Step 3: Apply a very thin coat of oil
Pour a few drops of oil into the pan, then rub it over every surface: the cooking face, the sides, the handle, and the outside. Use a clean cloth and work the oil until the surface looks almost dry. This is the step where most beginners go wrong. The film should be so thin it barely looks oily. If you can see pooled oil or shiny wet patches, wipe more off.
Step 4: Bake the pan upside down
Place the pan upside down on the middle or upper-middle rack so any excess oil drips away from the cooking surface. Set the foil underneath to catch it. Bake for one hour. Some people bake for two hours for a more durable finish, but one hour at a proper temperature is the standard approach in most manufacturer instructions.
Step 5: Let it cool completely inside the oven
Turn the oven off and leave the pan inside until it cools. Rapid temperature changes can cause the seasoning to craze or flake. When the pan is cool enough to handle, it is ready for a second coat.
Step 6: Repeat for a stronger base
A single layer is a start, but three to five thin coats build a much better foundation. Repeat steps 3 through 5 each time. Many home cooks do three rounds for a new pan and add more when re-seasoning after restoration. Each thin layer bonds more fully than one thick layer would.
Step 7: Do a short test cook
After your final coat, cook something fatty over medium heat, such as bacon, fried potatoes, or an egg in a little butter or oil. Early on, the surface may still stick slightly. That is normal. Wipe the pan clean after cooking and apply a thin film of oil while it is still warm.
Seasoning Methods Compared
The oven method is the most common, but it is not the only approach. The table below compares the main options so you can match the method to your pan and your kitchen.
| Method | How It Works | Best For | Main Drawback |
|---|---|---|---|
| Oven seasoning | Thin oil coats baked at 450°F to 500°F for about an hour each | New pans, full re-seasoning, stripped or rusted pans | Smoke, and some ovens cannot hold steady temperature |
| Stovetop seasoning | Heating a thin oil film on the burner until it smokes, then cooling | Quick touch-ups between full seasonings | Uneven results, and it is easy to leave spots unprotected |
| Grill or campfire | Heating oiled cast iron on an outdoor heat source | Large pans and Dutch ovens that do not fit in a home oven | Hard to control temperature, so results vary |
| Routine cooking | Frying fatty foods and oiling after each wash | Maintaining a pan that is already well seasoned | Too slow to repair a damaged surface |
Choosing the Right Oil
The oil you choose affects both the smoke point and the final texture of the seasoning. Refined oils with high smoke points are the safest bet for most cooks. Flaxseed oil is popular because it forms an especially hard finish, but it can flake if applied too thickly and it produces more smoke during baking. Animal fats like lard or bacon grease also work and build a good seasoning, though they can leave a faint odor early on.
Avoid using olive oil alone for oven seasoning. Extra-virgin olive oil has a lower smoke point and tends to leave a sticky finish. Many people use it for cooking on cast iron, which is fine once the pan is seasoned, but it is a poor choice for the initial bake.
Common Mistakes
- Applying too much oil. Thick layers do not polymerize fully. They turn gummy or sticky and can flake off in chips. Wipe until the pan looks almost dry.
- Skipping the drying step. Water left in the pores leads to rust under the seasoning, especially in humid kitchens.
- Baking at too low a temperature. Below about 400°F, the oil may not fully polymerize. Check your oven with a thermometer rather than trusting the dial.
- Pulling the pan out while hot. Sudden temperature shifts can crack the film. Let it cool in the oven.
- Forgetting the handle and exterior. Rust often starts on the outside and underside. Coat the whole pan.
- Cooking acidic food too early. Tomato sauce, wine reductions, and vinegar can strip fresh seasoning. Wait until the surface is well built up.
- Expecting instant results. A pan seasons through use over weeks. A few oven coats are a foundation, not the finish.
If your pan is already sticky or flaking, the problem is usually fixable. For a full walkthrough, see How to Fix and Restore Damaged Cast Iron Seasoning. Sticky patches often come from too much oil, and flaking usually means the layers were applied too thickly or not baked long enough.
Tips for Maintaining Your Seasoning
- Avoid soaking the pan. Wash it soon after cooking with hot water and a brush or scrubber.
- After washing, dry the pan on the stove and wipe on a very thin film of oil while it is still warm.
- Cook fatty foods regularly. Bacon, sausage, and fried foods help build a slick surface over time.
- Store the pan with a paper towel between it and a lid or other pans to hold in moisture from air.
- Keep acidic cooking short, or deglaze and move the food to another vessel when it is done.
For a broader look at caring for different materials, Cookware Maintenance Guide: Cast Iron, Carbon Steel, Stainless and Nonstick covers the routines that suit each type. If you are still deciding which pan to buy, Cast Iron Skillet Buying Guide for Home Cooks explains what to look for in weight, handle design, and surface finish.
Recommended Gear
- A rimmed baking sheet or heavy-duty foil. A sheet placed on the rack below the pan catches dripping oil and keeps your oven clean. Check price on Amazon
- An oven thermometer. It confirms the actual temperature inside, which matters because oven dials can be off by a noticeable margin. Check price on Amazon
- Flaxseed oil or refined vegetable oil. Flaxseed builds a hard finish, while refined vegetable oil is easier to find and has a higher smoke point for general seasoning. Check price on Amazon
FAQ
How many times should I season a new cast iron pan?
Three to five thin coats is a common starting point. Each layer bonds more fully when it is applied thinly and baked properly. You can add coats over time as you cook.
Why is my seasoned pan sticky?
Stickiness usually means too much oil was left on the surface during seasoning. The excess did not fully polymerize. You can bake the pan upside down at a higher temperature to firm it up, or strip and re-season if the problem is severe.
Can I season cast iron on the stovetop instead of in the oven?
Yes, for touch-ups. Heat a thin film of oil on the burner until it begins to smoke lightly, then let it cool. Stovetop seasoning is harder to apply evenly across the whole pan, so the oven method is better for building a full base.
Is it safe to use soap on seasoned cast iron?
Mild dish soap is generally fine for cleaning cast iron once the seasoning is established. Wash quickly, dry immediately, and re-oil lightly. If you are unsure about a specific pan’s finish, check the manufacturer’s care instructions. Consult the pan’s manual or a professional restorer if you have doubts about a vintage piece.
How do I know when the seasoning is good enough?
A well-seasoned pan has an even, dark, smooth surface with no tacky spots. Eggs slide with little or no added fat, and the pan resists rust after washing and drying. Most cooks find the surface improves noticeably after several weeks of regular cooking.