As an Amazon Associate we earn from qualifying purchases. This page may contain affiliate links.
If your cast iron seasoning looks spotty, the fix is usually simpler than it seems. Most blotchy, patchy, or tacky-looking surfaces come from uneven oil layers, polymerization that never fully set, or leftover residue from food and cleaning. This guide shows you how to diagnose the cause, clean the pan properly, strip the bad layers if needed, and re-season in thin, even coats so the surface turns dark, smooth, and consistent.
Why Cast Iron Seasoning Looks Spotty
Seasoning is not a coating you paint on. It is a layer of oil that has been heated past its smoke point until its fatty molecules bond into a hard, plastic-like film. When that process goes unevenly, the surface shows it. Light patches, dull grey areas, and sticky spots all point to a specific problem, and each one has a different remedy.
Before you change anything, look closely at the pan under good light. Tilt it, check the cooking surface and the sides, and note exactly where the problems are. A dull ring near the handle is a different issue from a sticky patch in the middle.
The most common causes
- Too much oil applied at once. Thick oil doesn’t polymerize evenly. The surface may turn tacky, gummy, or splotchy because the excess never fully bonded.
- Oven temperature too low. If the pan doesn’t reach a high enough temperature, the oil stays partly fatty instead of hardening. Many manufacturers recommend baking seasoning oil at around 450°F to 500°F.
- Cooking acidic or sticky foods too often. Tomato sauces, vinegar-based dishes, and wine reductions can soften or strip thin seasoning, leaving bare or dull patches.
- Residue left behind after cooking. Burnt-on food, oil that wasn’t wiped away, or soap film can cause uneven browning and patchy color.
- Light rust or moisture. Small orange or brown spots often appear where water sat on the surface. They look like seasoning damage but are really corrosion that has lifted the layer underneath.
- Multiple uneven layers built up over time. Years of quick, thick oiling can create a surface that looks mottled rather than uniform.
Diagnose the Problem First
Matching the symptom to the cause saves time. The table below covers the patterns people usually see.
| What you see | Most likely cause | Best next step |
|---|---|---|
| Sticky or tacky patches | Excess oil that didn’t polymerize | Wipe off, then bake a thin coat at high heat |
| Dull grey or flat areas | Thin or worn seasoning, often from cooking acidic foods | Clean, then add 2 to 3 thin layers |
| Brown or orange specks | Surface rust | Scrub, dry fully, then re-season the affected area |
| Blotchy dark and light areas | Uneven oil application or uneven heat | Strip the pan and re-season in thin, even coats |
| Flaking or peeling film | Seasoning built on a dirty or poorly prepped surface | Strip completely and start over |
Tools and Supplies You Will Need
You don’t need a workshop, but a few basics make the job cleaner and more predictable:
- Mild dish soap and a non-abrasive scrubber or chainmail scrubber
- Paper towels or a lint-free cloth
- A neutral, high-smoke-point oil such as flaxseed, grapeseed, or refined vegetable oil
- A rimmed baking sheet or a sheet of heavy-duty foil to catch drips
- An oven thermometer, so you know the real temperature inside
- Gloves, if you plan to use any stripping chemical
How to Fix Spotty Seasoning on a Pan That Is Still Mostly Intact
If the seasoning is only spotty in a few areas and the rest of the pan looks solid, you can often repair it without stripping. This is the gentler route and the right place to start.
Step 1: Clean the pan thoroughly
Wash the skillet with warm water and a small amount of mild soap. Scrub the sticky or dull areas gently. Avoid soaking the pan, and don’t leave it wet. Dry it right away with a towel, then set it on a burner over low heat for a few minutes until every trace of moisture is gone.
Step 2: Remove any loose or flaking film
Use a scrubber or a flat scraper to lift any bits that come off easily. Stop when you reach the solid, glossy layer. You want to remove material that is already failing, not the whole layer that is still bonded.
Step 3: Apply a very thin coat of oil
Put a few drops of oil on a paper towel and wipe the entire pan, inside, outside, and handle. Then take a clean paper towel and wipe again until the surface looks almost dry. This is the most important step. The pan should look like it has no visible oil on it. If you can see a shine or wet film, use another dry towel.
Step 4: Bake upside down
Place the pan upside down on the middle rack of a cold oven, with a foil-lined sheet on the rack below to catch drips. Heat the oven to around 450°F to 500°F and bake for one hour. Turn the oven off and let the pan cool inside.
Step 5: Repeat
Repeat the thin coat and bake cycle 2 to 3 more times. Each layer adds protection and evens out the surface. Stop when the color looks consistent.
How to Strip and Re-Season a Badly Blotchy Pan
If the seasoning is uneven across the whole pan, is flaking, or has rust under it, stripping gives you a clean base to start from. Stripping removes the existing layer completely. This is a bigger job, so take it step by step.
Option A: Oven self-clean cycle
Some owners strip cast iron by running it through an oven self-clean cycle. This burns off the old oil at very high heat. Check your oven’s manual first, and remove any plastic, rubber, or non-cast-iron parts. Expect some ash, and expect the pan to need full re-seasoning afterward. Many manufacturers advise against self-clean cycles for pieces with painted, enameled, or wooden parts, so confirm what applies to your pan.
Option B: Chemical stripping
Some people use a lye-based oven cleaner or a dedicated cast iron stripper. These work well but are caustic. Wear gloves and eye protection, work in a ventilated space, and follow the product label exactly. Rinse thoroughly with water afterward and dry the pan completely. If you are not comfortable handling strong chemicals, skip this route and consult a professional or use the oven method.
Option C: Vinegar soak
A diluted vinegar soak can remove light rust and some old seasoning, but it is slower and less predictable than the oven method. It also risks etching the iron if left too long. Check the pan every 15 to 20 minutes and rinse as soon as the old layer lifts. Dry immediately.
After stripping: re-season from scratch
Once the pan is bare and dry, it will rust fast if left exposed. Start re-seasoning right away. Apply a very thin coat of oil, wipe it off until it looks almost dry, and bake upside down at 450°F to 500°F for one hour. Repeat 4 to 6 times. Early layers look uneven, but the surface gradually turns dark and smooth.
Build an Even Seasoning Layer Going Forward
Once the surface is repaired, your daily habits decide whether it stays even. Use the routine below after every session:
- Clean the pan while it is still warm, with hot water and a soft brush or scraper. Avoid long soaks.
- Dry it completely on the burner for a minute or two.
- Wipe a thin film of oil over the cooking surface and handle while the pan is warm.
- Buff it with a paper towel until it looks almost dry.
- Store it in a dry spot.
For a deeper look at how thin layers build over time, see How to Layer Seasoning for Maximum Flavor. If you want the basics of how the coating forms and why oil choice matters, Cast Iron Seasoning Basics covers the chemistry in plain language. If you are dealing with broader damage rather than just spotting, How to Fix and Restore Damaged Cast Iron Seasoning walks through more severe cases.
Common Mistakes That Cause Spotty Seasoning
- Using too much oil. A pan that looks wet after oiling has too much. The extra oil will turn sticky instead of hard.
- Skipping the wipe-off. Wiping until the surface looks almost dry is what makes the layer even.
- Baking at too low a temperature. If your oven runs cool, use an oven thermometer. Low heat leaves oil partly unset.
- Leaving the pan wet. Water causes rust spots that look like seasoning problems.
- Storing the pan in a humid place. Damp cabinets encourage rust under thin areas.
- Soaking the pan. Long soaks lift seasoning and can leave dull, uneven patches.
- Ignoring rust spots. Small spots spread if left alone. Scrub and re-season them early.
- Using the wrong oil. Oils with low smoke points or high moisture content can leave tacky films. Stick with flaxseed, grapeseed, or refined vegetable oil for building layers.
Recommended gear
These items help with the cleaning, oiling, and baking steps. Choose by pan size and what you already own.
- Chainmail cast iron scrubber. Removes sticky residue and loose film without stripping well-bonded seasoning. Check price on Amazon
- Oven thermometer. Confirms your oven is really reaching 450°F to 500°F, which is critical for proper polymerization. Check price on Amazon
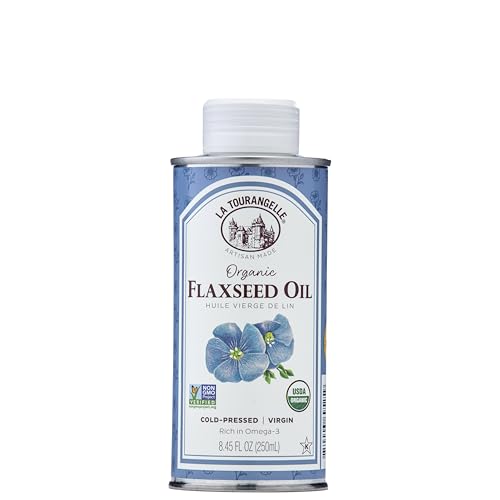
- Flaxseed oil for seasoning. Many cooks choose it for its ability to form a hard, durable layer when baked thin. Check price on Amazon
- Lint-free kitchen towels or microfiber cloths. Make it easier to wipe the surface nearly dry, which is the step most likely to prevent tackiness. Check price on Amazon
FAQ
Is spotty seasoning dangerous to cook on?
Generally, no. Uneven seasoning mostly affects how well food releases and how the pan browns. If you see flaking flecks in your food or the coating is peeling, clean the pan and re-season it. If you have questions about a specific health concern, consult a professional.
Can I fix sticky seasoning without stripping the pan?
Usually, yes. Wipe the pan down, remove the tacky film with a scrubber, dry it on the stove, then apply a very thin coat of oil and bake it upside down at high heat. Repeat until the surface looks even.
How many layers does it take to fix a blotchy pan?
Most pans need 3 to 4 thin layers to look consistent after a light repair. After stripping and starting from bare metal, 4 to 6 layers is a common target. Results depend on your oil and oven.
Why does my pan look dull after I re-season it?
Dull color often means the layers are still thin or unevenly applied. Keep baking thin coats, and cook fatty foods regularly. Frequent use builds a darker, smoother surface over time.
Should I re-season after every wash?
Not necessarily. A light coat after washing and drying is enough for maintenance. Full re-seasoning is needed only when the surface looks patchy, rusty, or worn. For broader care routines, see Cookware Maintenance Guide: Cast Iron, Carbon Steel, Stainless and Nonstick.